We may earn a commission if you buy through links on this page, at no extra cost to you. Picks are based on specs, retailer data and owner reports, not paid placement. Disclosure.
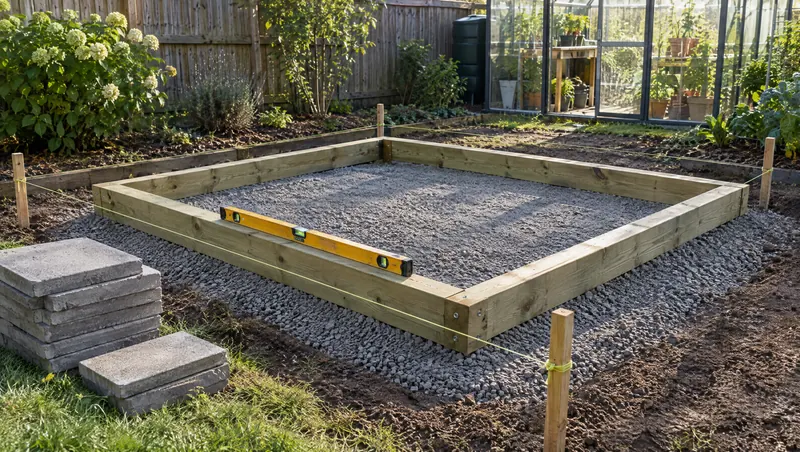
The best greenhouse foundation for most kits is a treated-timber frame on 3-4 in of compacted gravel, leveled, squared (equal diagonals) and pinned down with rebar or ground anchors. It's cheap, DIY-friendly and works under almost every kit up to 10x12. Choose concrete footings or a slab for glass, heavy aluminum or very windy sites; choose pavers if you want a solid floor without concrete; and use the maker's base kit if your greenhouse has one. Whatever you pick, the base must be level, square and anchored: Juliana warns that otherwise glazing becomes difficult, and Palram makes anchoring to a level base a warranty condition.
A greenhouse is a light frame with a lot of surface area, which makes it a sail. Nearly every story of a wrecked kit, popped panels or a door that won't close starts with the greenhouse base. Yet search for "greenhouse base" and you mostly find forum threads and videos of one person's build. This guide compares every common foundation, then walks through the two most popular DIY builds (timber and pavers), squaring and leveling, anchoring to the maker's guidance, and greenhouse flooring with drainage.
Our guidance comes from manufacturer installation manuals (Palram-Canopia, Juliana), extension publications and owner reports. We have not built these bases ourselves. How we research.
Greenhouse foundation options compared
| Base | Best for | Cost | DIY difficulty | Watch-outs |
|---|---|---|---|---|
| Ground anchors / stakes only | Hoop houses, pop-ups, film walk-ins | Anchor 4-pack $30 | Easy | No level surface; not enough alone for hard-panel kits |
| Kit steel base frame (included with many aluminum kits) | Palram Mythos, Hybrid, Balance, Riverstone MONT and others | Included | Easy | Not a foundation by itself; must sit level and be fixed down |
| Maker's resin base kit | Palram/Rion Prestige, Hobby/Grand Gardener, EcoGrow | $269–$389 (6 ft); $359–$659 (8 ft) | Easy | Must be dug in level and filled with soil or concrete |
| Treated-timber frame on gravel | Most kits up to about 10x12; DIY builds | Lumber, gravel and rebar at local prices | Moderate | Use ground-contact rated lumber |
| Paver base | Small to mid kits where you want a solid floor | Varies with the paver | Moderate, labor-heavy | Needs a compacted gravel sub-base; anchor through or beside the pavers |
| Concrete footings / perimeter | Glass, heavy aluminum, windy sites | Bagged or ready-mix concrete | Hard | Check frost depth and permits |
| Concrete slab | Permanent greenhouses, garden rooms | About 36 bags of 80 lb mix for an 8x8 at 4 in (estimate) | Hard; often hired out | Plan drainage and a floor drain or slope |
Kit makers often specify the base. Palram-Canopia's base-kit manual gives two options: screw or masonry-anchor the kit to a foundation, or on firm ground, grass, soil or gravel, dig it in to its own height, level it and fill it with soil or concrete. Juliana's assembly guide calls for a spirit level, cement and gravel, and a spade or post-hole digger, and says bases larger than 9 m² (about 97 sq ft) need extra anchor legs.
How to build a timber greenhouse base (step by step)
This is the base we would point most kit buyers to. The example is 6x8; scale the lumber to your kit's footprint, which you'll find in the manual (it is often a few inches different from the nominal size).
- Get the exact footprint. Read the kit manual for the base dimensions and fixing points before you buy lumber. Some kits, like the AMERLIFE 6x12, recommend a foundation larger than the greenhouse (6.5x13 ft).
- Mark out and call 811. Pick a level, sunny spot, mark the rectangle with stakes and string, and call 811 to have buried lines marked before you dig.
- Strip and level. Remove the turf and roots across the whole footprint plus about 6 in all round. Level the soil, cutting high spots rather than filling low ones where you can.
- Lay the gravel pad. Put down landscape fabric, then 3-4 in of crushed gravel, compacted with a hand tamper or plate compactor in two layers. An 8x10 pad at that depth needs about 1 cubic yard (estimate).
- Build the frame. Cut ground-contact treated 4x4s or 4x6s to the footprint. Join the corners with half-laps or structural screws. For a taller base or a frame on a slope, stack a second course and stagger the joints.
- Square it. Measure both diagonals and nudge the frame until they match. Check each corner with the 3-4-5 rule (below).
- Level it. Check every side and both diagonals with a 4 ft level. Shim with gravel, never with wood scraps that will rot.
- Pin it down. Drill through the timbers and drive rebar 2-3 ft into the ground at each corner and every 3-4 ft along the sides, or fit screw-in ground anchors inside the frame. The Compost Education Centre's DIY hoop greenhouse used rebar 2 ft deep at the corners and every 3 ft.
- Fix the greenhouse to it. Screw the kit's steel base or bottom profile to the timber with the fixings in the manual, or use a fixing kit such as Palram's HG1025 hanging and anchoring kit for Rion resin greenhouses.
How to build a paver greenhouse base
- Excavate. Dig out the footprint plus 6 in all round to the depth of your gravel, sand and paver combined.
- Sub-base. Compact 3-4 in of crushed gravel in layers.
- Bedding. Screed about 1 in of coarse sand flat, using two pipes as rails and a straight board.
- Lay the pavers. Start at a square corner and work out, checking level often. Allow 5-10% extra for cuts.
- Edge and fill. Add edging so the pavers can't creep, then sweep sand into the joints.
- Anchor. Pavers don't hold a greenhouse down. Either set a timber frame on the pavers and pin it through to the ground at the corners, or drill into solid pavers with masonry anchors, or fit ground anchors through gaps left at the corners.
A popular hybrid: a timber perimeter frame with pavers only down the path and soil or gravel under the benches. You get a clean, firm walkway and keep beds for in-ground crops.
Concrete footings and slabs
Concrete is worth it for glass greenhouses, heavy aluminum kits such as the Riverstone MONT or Exaco RIGA, sites exposed to strong wind, and greenhouses you'll heat all winter. Two common approaches:
- Perimeter footing or piers: a concrete strip or posts under the walls, with a gravel or soil floor inside. Less concrete, and the floor still drains. Palram notes that windy areas may need extra stakes or concrete footers even with its base kit.
- Full slab: about 4 in thick on compacted gravel. An 8x8 slab is about 21 cu ft of concrete; at 0.6 cu ft per 80 lb bag that's roughly 36 bags (our estimate), and a 10x12 slab about 67. Slope it slightly toward a door or drain.
Footings for permanent structures normally go below the local frost line, and a slab may trigger a permit review even for a small greenhouse; see the permit note at the end.
If you plan to heat in winter, insulate the edge. University of Alaska Fairbanks Extension gives an uninsulated perimeter a heat-loss factor of 0.8, falling to 0.4 with 2 in foam board 24 in deep. More in our winter greenhouse guide.
Anchoring your greenhouse: follow the maker
A level base that isn't fixed to the ground doesn't help much in a storm. Owner reports for 6-ft aluminum kits include a Mythos wrecked by gusts of about 30 mph before its bolts and bracing were upgraded. Follow your manual, and add more where you're exposed.
Palram HG1029 Anchor Kit
Palram's over-the-top cable system ties the frame down with two steel cables per kit, and Palram recommends two kits for greenhouses longer than 12 ft. It's aimed at the Nature Series (Mythos, Hybrid, Essence) in windy areas and works alongside a fixed base, not instead of one. The Snap & Grow uses a separate SKU (HG1022), so check the version.
Why it stands out
- Made for the frame, so no improvised brackets
- Holds the roof down, where storm damage usually starts
Watch out for
- Two kits needed for longer houses
- 1-year warranty
Full specs
- Key specs
- Steel over-the-top cable anchoring system; one kit gives two cables over the structure; Palram recommends two kits for greenhouses or sheds longer than 12 ft; 6
Specs from planetgreenhouse.com, planetgreenhouse.com. Prices checked Oct 2026 and change often.
18-in Ground Anchor Kit (4-pack)
Four 18 in screw-in anchors with galvanized cable and turnbuckles: a cheap way to tie down a hoop house, a film walk-in or a kit without its own anchoring system. Screw them in at the corners, run the cable over or to the frame, and tension with the turnbuckles. The listing gives no holding-strength rating and no brand, so treat it as an extra, not your only anchoring in high-wind areas.
Why it stands out
- Low cost, no concrete
- Turnbuckles let you re-tension
Watch out for
- No published pull-out rating
- Unknown brand
Full specs
- Key specs
- 4 × 18" screw-in ground anchors with 1/8" galvanized cable and turnbuckles; listed for sheds, carports, gazebos and greenhouses (Amazon listing title).
Specs from amazon.com. Prices checked Oct 2026 and change often.
Palram Hobby Gardener 8x8 Base Kit
For Rion-style Palram greenhouses (Hobby Gardener, Grand Gardener, Prestige), this push-fit resin frame raises the greenhouse up to 5 in and is filled with soil for stability. Palram's instructions say to place it on a solid, level surface, and the listing warns that strong-wind areas may need extra stakes or concrete footers. Sizes run from 8x8 to 8x20.
Why it stands out
- No concrete needed
- Matched to the greenhouse profile
- UV-protected resin, won't rot
Watch out for
- Costly for what it is compared with timber
- Still needs level ground and, when windy, extra anchoring
Full specs
- Key specs
- Push-fit resin base frame, heavy-duty and 100% UV-protected, U-shape honeycomb design; assembled 8' × 8' × 5"; raises the greenhouse up to 5"; filled with soil
Specs from planetgreenhouse.com, canopia.com. Prices checked Oct 2026 and change often.
For hoop houses: Bootstrap Farmer's 10x12 kit comes with 36 in ground stakes and a post driver, and the seller says heavy-snow or windy sites need extra anchoring. See hoop house kits.
Leveling and squaring: the 3-4-5 rule
Most "the panels won't fit" complaints trace back to a base that is a little out of square. Two checks fix it:
- Equal diagonals: measure corner to corner both ways. If they match, the rectangle is square. On an 8x10 base, both diagonals should be about 12 ft 9⅝ in (our calculation).
- 3-4-5 at each corner: mark 3 ft along one side and 4 ft along the other; the distance between the marks must be exactly 5 ft. Use 6-8-10 ft on bigger bases for more accuracy.
- Level: check with a 4 ft level on every side, then across the diagonals with a straight board. A laser level or a clear water-filled hose works well on longer bases.
Build the base on a calm day the weekend before the greenhouse, and check it again before you start the kit: a base that settled after rain is easier to fix empty.
Greenhouse flooring options
| Floor | Pros | Cons | Best for |
|---|---|---|---|
| Gravel over weed fabric | Cheap, drains freely, adds a little humidity when wetted on hot days | Hard to sweep; uneven for carts | Most hobby greenhouses |
| Pavers or bricks | Firm, clean, store some daytime heat | More work and cost; joints can grow weeds or algae | Paths and potting areas |
| Concrete | Easiest to clean and disinfect, best for wheelbarrows | Needs a slope or drain; no in-ground beds | Permanent and heated houses |
| Soil beds | Grow directly in the ground | Muddy paths unless you add a gravel or paver walkway | Hoop houses, tomato and cucumber growers |
| Weed fabric alone | Cheapest | Slippery when wet; wears through | Temporary or seasonal houses |
Drainage matters more than the material. A greenhouse floor gets wet every day you water. Keep the floor at or slightly above the surrounding ground, slope solid floors gently toward the door or a gravel-filled drain, and don't let gutters dump roof water next to the base. Brick and concrete also act as thermal mass: UAF lists concrete at 224-896 Btu per cubic foot and brick at 271-813 over its storage range, which helps a little on cold nights.
Do you need a permit for a greenhouse foundation?
The 2021 International Residential Code exempts one-story detached accessory structures up to 200 sq ft from a building permit, but towns can set lower limits, and a permanent foundation can change how a structure is treated. In New Jersey, for example, hoophouses are only exempt from construction permits if they have no permanent anchoring or foundation. Zoning setbacks apply either way. Ask your building department before you pour concrete.
Next steps: work out the full budget in how much a greenhouse costs, or if you're building the greenhouse too, follow our DIY greenhouse guide. Size-specific base quantities are in the 8x10 and 10x12 guides.
Frequently asked questions
What is the best foundation for a greenhouse?
For most hobby kits, a level treated-timber frame on compacted gravel, pinned to the ground with rebar or ground anchors. Use concrete footings or a slab for glass greenhouses, heavy aluminum kits and very windy sites.
Does a greenhouse need a foundation?
Yes, every hard-panel greenhouse needs a level, square and anchored base. Kit makers make it a condition: Palram requires a level, anchored base for its warranty, and Juliana says that if the base isn't level and square, glazing becomes difficult. Film hoop houses can use ground stakes instead.
Can I put a greenhouse directly on grass or soil?
Not directly. Grass settles and stays damp, so the frame twists and the panels pop. Strip the turf, level the soil, and build a timber or paver base, or use a maker's base kit that is dug in level and filled with soil or concrete.
What is the best flooring for a greenhouse?
Gravel over weed fabric is the most common choice: cheap, drains well and holds a little heat. Pavers give a firmer, cleaner path. Concrete is easiest to clean but needs a drain or slope. Many growers combine a paved path with soil beds.
How deep should a greenhouse foundation be?
A timber base sits on 3-4 in of compacted gravel. Concrete footings for permanent greenhouses usually go below your local frost line, which your building department can tell you. Ground anchors and rebar typically go 18 in to 3 ft deep.
How do I make sure my greenhouse base is square?
Measure both diagonals: when they are equal, the base is square. For a quick check on a corner, use the 3-4-5 rule: mark 3 ft along one side and 4 ft along the other; the distance between the marks should be exactly 5 ft.
Keep reading
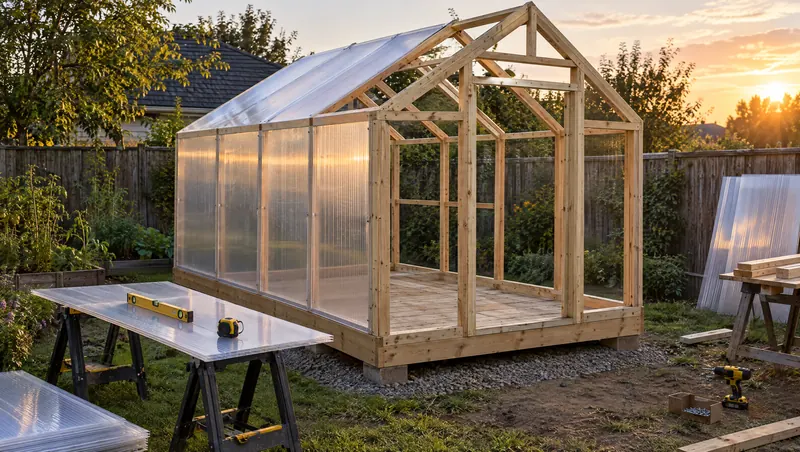 Build guideHow to build a DIY greenhouseFour ways to build a greenhouse yourself, a full 8x10 step-by-step, real material costs and when a kit is the better deal.
 Cost guideHow much a greenhouse costsGreenhouse prices by type and size, cost per square foot, the hidden extras and what heating really costs per night.
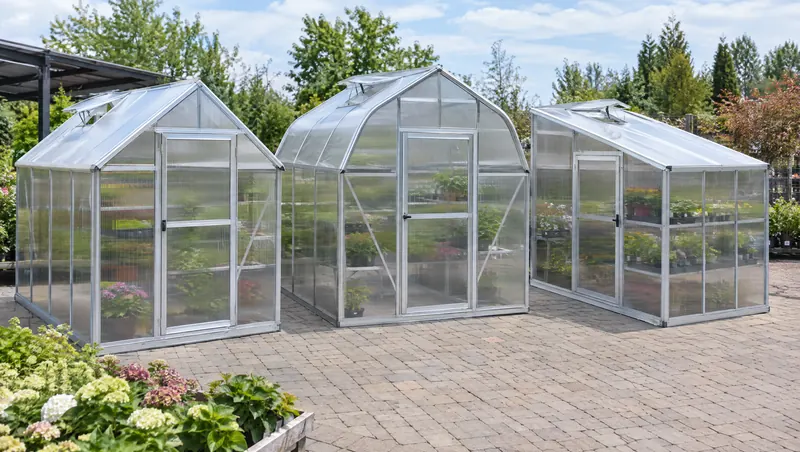 Brand reviewPalram-Canopia reviewMythos vs Hybrid vs Harmony, Balance vs Glory vs Bella: every Palram-Canopia line, its panels, ratings and who it suits.
 Kits by size10x12 greenhouse kits10x12 kits from a hoop house to a garden room, with the real cost of the base, anchors and extras.
 Kits by size8x10 greenhouse kitsTrue 8x10 kits are rare. The best ones, the 8x12 alternatives, and a to-scale layout of benches and beds.
 Kits by typePolycarbonate greenhouse kitsTwin-wall vs clear panels, thickness and R-values, plus six aluminum hobby kits from starter 6x8s to snow-country builds.